Written by Kirsty Pardede
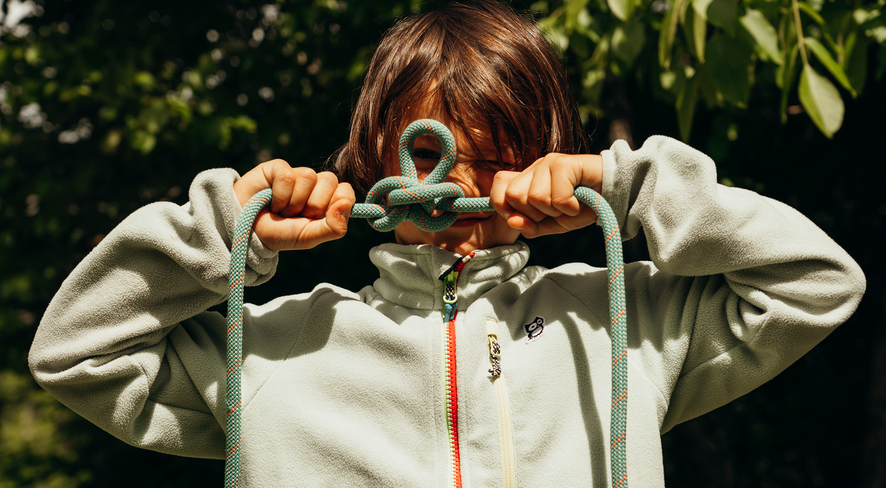
As a family of climbers on the road, knots are second nature to us but they’re useful far beyond the crag too. We spend a lot of life tying different knots from tying in to building belays to building swings for the kids and one of the most useful knots in our arsenal is the alpine butterfly.

Its an incredibly useful knot to know for several reasons:
- It creates a highly secure knot which can handle loads in 3 directions yet remains easy to untie even after being heavily weighted.
- It can be made in the middle of a rope meaning you don’t need access to the ends to tie it.
- Its easily adjustable by feeding slack through the knot to adjust the size of the loop and its so recognisable, its easy to check for correctness at a glance.
We use alpine butterfly’s for different technical applications in climbing but we also use it to make a fun, quick to tie swing for the kids around camp when they’re bored, and its a really easy knot to teach your kids the way we do it. :)
Tie an alpine butterfly in four simple steps

Step 1 - Make the first loop around your palm close to your thumb.

Step 2 - Make the second loop around your fingers, far away from the first loop with a space in the middle.

Step 3 - Make the final loop in-between the first and the second loop.

Step 4 - Take the second loop you made, the one across your fingers and pass it over the top of the other two, tucking it in under both and then pull it through.

You now have an alpine butterfly and you can feed the seat into the loop of the alpine and tighten and adjust as necessary, by feeding or pulling tight the rope on either side.
The challenge of full time travel
Living full time on the road the last 3 years in our tiny home on wheels of 9m2, one of the things I miss most about our previous conventional life is having a washing machine. Doing laundry - either by hand or finding laundrettes - when you’re full time travelling is a special sort of nightmare. And getting 4 peoples worth of clothes dry has caused us to develop some creative solutions. :)

We don’t always have access to a dryer and we almost exclusively camp wild in remote areas when climbing. Slinging up washing lines in nature is frowned upon or flat out not allowed in most places so we tie a few lines off at the back of the van using a double half hitch - another easy to tie knot that can hold the line tight but is quick and easy to untie if it starts raining!
Step 1 - Loop the rope around the thing you want to secure it too.
Step 2 - Pass the working end up through the loop.
Step 3 - Pull the working end tight against the object. Take the working end under the standing rope and pass it back through the loop, pulling it tight.

We don’t normally have a lot of laundry on each line but if you need to hang a heavier load or secure it against high winds, add a double turn BEFORE you tie the knot, which means looping the rope around the object a couple of turns before beginning with step 1.
Back it up
Probably the simplest knot on this list, but also one of the most useful to know and practical in everyday life is the stopper knot.
Its job is exactly what it sounds like: it stops the rope from slipping back through something accidentally. We use stopper knots all the time in everyday life - from securing the ends of the rope when tying down tarps and loads, to stopping ropes pulling through swings, hammocks, washing lines, or kids’ outdoor setups. It’s a small skill that adds safety, security, and peace of mind, especially when you spend a lot of time outdoors. The beauty of a stopper knot is that like the others, it’s quick to tie, easy to remember, and surprisingly versatile.
To tie a simple stopper knot:
Step 1 - Take the end of the rope and make 2 small turns by looping the rope around itself.
Step 2 - Pass the tail end of the rope through the loops and pull it tight to form a neat knot at the end of the rope.

The finished knot creates a bulky end that helps prevent the rope slipping back through knots, holes, pulleys, or your hands. Simple, but incredibly useful.
For us, this kind of thing is what makes knots so valuable beyond climbing and why we’re teaching our kids lots of them. They’re not just skills reserved for the rock, but practical little pieces of knowledge we use constantly as a family outdoors. Whether it’s rigging up swings, securing gear, fixing lines, or solving problems on the fly, learning a few simple knots opens up a whole world of confidence and capability outside. Sometimes the smallest skills end up being the ones you use the most.


